


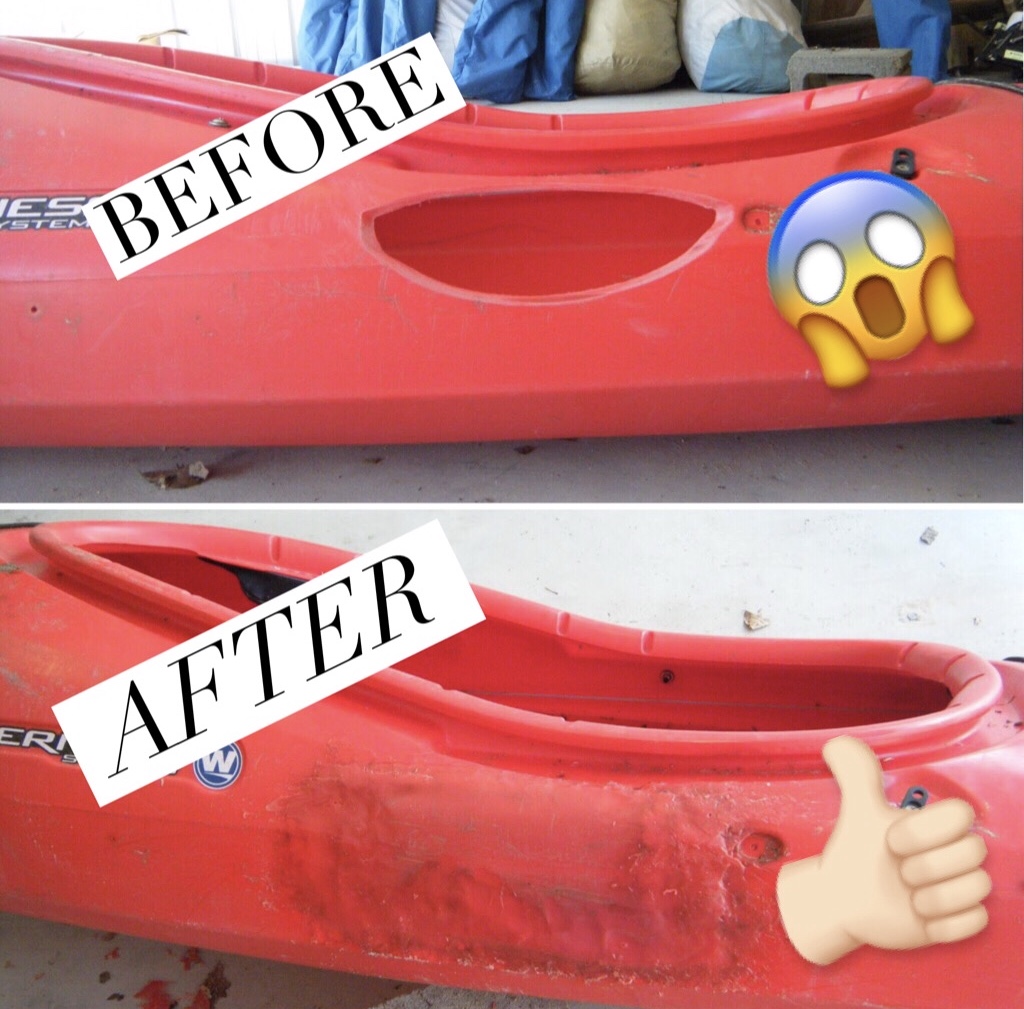
It isn't very likely that you'll have a kayak with such a large hole, but whatever the size, here's how to fix it.

- Heavy duty gloves
- Heat gun (propane blow torch works in a pinch)
- Metal spoon / spatula
- Patch (made from spare boat, 50 gallon plastic barrel, etc)
- Water bottle for temperature regulation and safety
- Safety glasses
- Pliers
- Clamp (depending on the type of repair)
- Rough grit sandpaper
- Well ventilated space
Prepping the kayak and the patch
If the hole is next to the seat or any rigging or anything that would either get in the way or catch fire, remove it. For the boat pictured, we had to take the seat out, take the paddle holder off, and move the rudder cable.
Sand the edges of the patch and the edges of the hole. I used a grinder for the patch to make things go faster. Some people will tell you to sand the side of the patch that will stick to the boat and the plastic of the boat around the hole the patch with attach to. I don't know if this helps the patch stick or not because I didn't bother doing it. It's probably worth trying.
Attaching the patch
This is truly the hardest part. I needed assistance because you have to move very quickly.
set up your work space so that everything is accessible.
set up your work space so that everything is accessible.
- Put on your gloves
- Turn on the heat gun or ignite the torch
- With the pliers, hold the patch at a corner
- Using the torch/gun, melt the patch to the point that it is droopy but be careful not to burn a hole in it. Its easy to burn a hole through it with a torch. A little harder with the gun. I use slow sweeping motions across the body of the patch
- Sweep the torch across the outer edges of the hole enough so that the plastic starts to turn a different color. This boat turned yellow when it was ready, others turn white. be careful not to stay in one place for too long or you'll have two holes instead of one!
- You have to work EXTREMELY quickly, while both the patch and the boat are still hot. The patch needs to be pretty droopy and the boat sticky. you'll have to hold the patch in your hands and press it to the boat. Even with gloves on it gets hot!
Smoothing things out

Now that the patch is on, you need to make sure it'll stay on, hold water and look a bit better. This means you'll need to smooth things out. this part is really all about trial and error. It took me a good 15 minutes to get the technique down. Here's what to do.
- Get your torch and metal spoon or putty knife
- Frequently the edges of the patch won't be stuck to the boat even if the patch is staying stuck to the boat, I held the torch so that the flame went between the edge of the patch and the side of the boat until both turned yellow then I pressed them together using my gloved hand or the spoon.
- To smooth things out: heat up a small area (4 square inches) at the edge of the patch until it turns a color but not to the point that it catches on fire
- With small sweeping and frequent strokes, sweep the melted plastic of the patch out onto the sides of the boat. move quickly. as the plastic cools, or if you press too hard, the plastic with stick to the spoon. I would frequently wipe the hardened plastic off the back of the spoon using the cinder block
- It is best to heat up a small section and focus on it until you are satisfied with the smoothness and then move on. don't heat up a long section and try to work because it cools too quickly
- I turned the boat over and propped it up on a cinder block for better access to the bottom of the patch
 |
| Watertight but still needing sanding |
Now if you want to, you can use the torch on the inside of the boat to transition the plastic of the boat to the patch. This time you're smoothing the plastic of the boat onto the patch. I think this step isn't very necessary unless your patch is leaking.
Now all you need to do is sand the patch smooth.
What about repairs in the field?
The repair above is a reliable, secure and permanent repair, but requires lots of equipment you wouldn't have with you out on a trip. What do you do if you put a hole in your kayak while out on a trip?
Triage paddler safety Keep the paddler safe by either landing or keeping the kayak afloat using a paddle float and improvised flotation made from dry bags filled with air. I always have two paddle floats and an empty dry bag with me on my trips.
Choose repair method Both JB Water Weld and Flex Tape will work underwater. Flex Tape is a great general purpose option, and best for larger holes. JB Water Weld works well for punctures and in places where curvature of the boat won't work as well with Flex Tape. Flex Tape won't work on plastic kayaks that have a dimpled or textured surface.