Pages

Drop Down MenusCSS Drop Down MenuPure CSS Dropdown Menu

Inshallah - The Arabic Word the West Needs

**Please realize that I am not Muslim, and do not speak for Muslims, nor am I attempting to do so. This is my experience and relationship as an atheist western woman with an inherently religious Arabic word. **


It is my personal experience and belief that we in the West would benefit from the daily reminder of a word like Inshallah. I have come to really love the word, even though I am not Muslim. Before I get into how we could benefit from using this word in our own conversations, let's look at its meaning and context.
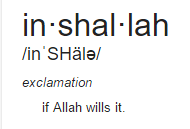
Inshallah, translated literally, means 'God willing' or 'if God wills it.' It is meant to be used seriously, when you truly hope something will happen. An example of this use might be when speaking about a loved one who is ill.

In modern language, it is used in this way, as well as more liberally as punctuation and in jest. For example, if a child asks his parent if they can go to get ice cream, the parent might say inshallah (translation: probably not)

There are similar words in other languages. Spanish, for example has its own word that was borrowed from Inshallah- Ojalá. In the formal sense, it means God willing, informally it means hopefully.

My relationship with this word did not begin as rosy as it is now. When I lived in UAE and Oman, I flip flopped between being pissed off and emboldened by it.

Gaining Grit: How to find and nurture the badass within


One of my many hundreds, perhaps thousands, of
 painful moments outdoors.
After hearing a recap of one of my particularly harrowing adventures, people often react with: "I don't know how you do it." For some reason, many people think that I'm fearless or super fit or something to be doing the things I do. But here's the thing,
I am not remarkable.
Let me tell you, I still cry on really tall exposed rock climbs. I huff and puff and get all red faced while hiking. I hate being cold. The difference between them and me is just a practiced mindset. Many people call this mindset 'grit.' 

Grit is mental fortitude and resiliency. With practice, it becomes an automatic emotional response that kicks in whenever you need it. 


Grit is like any muscle- the more you use it, the stronger it gets. Unlike a muscle, it is a bit trickier to activate.

I am an ordinary human who has been able to make my grit muscle strong. Everyone has grit, you've just got to find yours and strengthen it.

Keep reading to learn what grit can do for you, and how to get it


Cowboy Coffee: How to make coffee without a filter


I always wondered how the cowboys in the old west made their coffee. I'm sure they didn't bother with filters or something as fancy as a French press.

On my first overnight pack trip at Rock Creek Pack Station, I learned the trick. 

Here is what you need:
  • A heat source
  • A metal kettle or pitcher
  • Coffee grounds
  • Water
  • A small cup

Directions:
  1. Fill the kettle 3/4 full of water and put it on your heat source to boil 
  2. Fill the small cup with the coldest water you have 
  3. Once the kettle water is boiling, slowly add the coffee grounds. Be careful because adding coffee grounds can make your kettle boil over. If it looks like it is about to, pull it off the heat for a second or two 
  4. Boil the coffee for a couple of minutes
  5. Reduce the heat to low
  6. To get the coffee grounds to sink to the bottom, pour the cup of cold water over the grounds
  7. Pour carefully and the grounds will stay on the bottom

DIY Outdoor Gear Resources to MYOG


MYOG DIY outdoor gear making resources

I love making things myself. I've always dreamed of having my own outdoor brand- not a very feasible business idea that I would probably end up hating in the long run. With all the technical fabrics available online, we are no longer bound to the products made by big outdoor brands. You'll find fabric, patterns and tutorials online for everything from backpacks to tents to sleeping bags and rain jackets. I've put together the resources I go to when I have a project. If you know of any that I haven't listed, please mention them in the comments.


Forums
HammockForums.net This forum is the go-to spot for hammock camping tricks. There is a forum for all things DIY, just don't post with tent making questions as it is a hammock camping only forum.

WhiteBlaze.net This is a community of Appalachian Trail enthusiasts with TONS of info on the AT- you can get answers to all your AT questions. There is also a forum on here for DIY gear.

BackpackingLight has forums dedicated to a variety of topics including a MYOG Forum (make your own gear) To post to the forum you must have a basic membership to the site which costs $5 a year

Backpacking.net has a little corner of their website dedicated to a MYOG forum. 

MYOG on Reddit - A fantastic forum full of resources, projects and advice

DIY 20°F Ultralight Backpacking Quilt Part 4-
Final Touches and Thoughts

Final Touches

Installing the Cord / Bungee

  • Cut your cord or bungee at least 6 inches longer than the length of your casing. This will make it easier to tie knots in once it is in place. 
  • Use some wire (I used a paper clip) to create a hook that will enable you to feed your cord through the casing
  • I used glow in the dark paracord because I had a bunch laying around. To reduce bulk and weight, I removed the core strands. 

My hook made from a paperclip
Drawcord with mini-cord locks installed


DIY 20°F Ultralight Backpacking Quilt Part 3 - Pinning and Sewing


Stacking and Pinning

If you are using thick insulation like I am, you will definitely need 'quilting' length straight pins. Using regular length pins will not work. I bought 1 3/4" pins for 7.5oz Climashield and it worked. If I had 10oz I would need longer pins. 
  • Pin your Shell and Liner fabric with right sides together. If your fabric has a side that is more shiny, that is the 'wrong' side
  • Sandwich the straps or draft flaps between the shell and liner, with the end of the strap/flap you want to be on the outside edge of your quilt pointing toward the center line of the quilt
  • After you've pinned the shell and liner to each other, pin the insulation on the bottom to them. The insulation will run against the feed dogs of your sewing machine


DIY 20°F Backpacking Quilt Part 2- Marking and Cutting

What you need to mark and cut

  • Weller Woodburner or a hot knife. Any nylon fabric needs to be cut with heat so that the edges are sealed and will not unravel. Even capturing the edge with a french seam only delays unraveling. 
  • Some sort of heat-resistant material to put under your shell and liner fabrics- either a piece of wood, metal or glass. A few people online have used scissors to cut the fabric and then sealed the edge with a lighter, but they say it is extremely easy to accidentally melt too much fabric.
  • Good Sharp Fabric Scissors at least 9" long if you are working with thick insulation like I am. If your insulation is thinner, smaller scissors will work. Just make sure they're sharp. 
  • Permanent fine tip marker
  • Tailors chalk

DIY 20°F Ultralight Backpacking Quilt for $100 Part One

Why a Quilt?

This is what I already have-
The fitted sheet and tech blanket by
Thermarest
I chose to use a quilt for my sleep system this summer for several reasons:
  1. The insulation underneath you in a sleeping bag gets so compressed that hardly provides any insulation
  2. Quilts weigh less
  3. I toss and turn at night and sleep on my stomach, back and side. Mummy bags annoy me. 
  4. I already have the Thermarest sleep system which consists of a fitted sheet for my sleeping pad and a very lightweight tech blanket that snaps to it. I plan to use my fitted sheet with my DIY cold weather quilt. 
  5. I couldn't afford a high quality 20°F mummy bag that weighed a reasonable amount. 
Why bother making it myself?
  1. I have read online that people with no sewing experience have been very successful making these. I have a good amount of sewing experience so I hope it will be easier for me.
  2. The wait time to get a quilt from a manufacturer is up to 8 weeks and I didn't have that long to wait. 
  3. I saved $80 by making it myself
  4. I get to make my blanket in the colors I want and with all the details I want

Design and Dimensions

My quilt design is based on the Prodigy Quilt by Enlightened Equipment.
I think the Prodigy is a good product at a reasonable price ($180), but I really needed to save the $80 and make it myself. I also wanted specific colors and a specific kind of liner fabric. 
I picked this design for several reasons:
Prodigy Quilt by
Enlightened Equipment
  1. A casing (sewn channel of fabric) at the shoulders and foot with a bungee cord inside make it easy to create a foot box and cinch the quilt around the shoulders, eliminating heat loss.
  2. The simplicity of the design lends itself to ease of construction- it is a simple polygon without a hood, pockets or sewn channels
  3. The Enlightened Equipment website provides the exact dimensions for quilts to fit different sized people which eliminated the guesswork of figuring out how long and wide my quilt needed to be in order to be comfortable for my size. Here is a link to their Quilt Sizing page which has all the details.
I used the specs for the Short length, Narrow Width quilt which is for little people up to 5'6" who sleep on their backs or toss and turn at night. The finished specs for it are as follows:
Basic Specs:
Total length: 72"
Top half width- 50"
Tapers to 38 " at the foot box.
Insulation- 7.5 ounce Climashield (synthetic insulation)

Weight- 29.65 ounces

I chose to make my quilt go to 20°F because I tend to be a very cold sleeper. Here is a chart to help you choose which weight Climashield you should use:
2.5 oz - 50°F $7.00/yd
3.6 oz - 40°F $9.00/yd
5.0 oz - 30°F $10.95/yd
6.0 oz- 20°F $14.00/yd (only available from DutchWare Gear)
7.5 oz - 10°F $16.95/yd
10 oz - 0°F $23.50/yd
Materials List:
Total Cost: $96 with shipping

Tools and necessities:
  • Sewing Machine with walking foot
  • Quilting Straight pins at least 1 3/4" long
  • Hot knife / Woodburner with blade tip or scissors and lighter for cutting nylon
  • Lighter for sealing cut ends of bungee and elastic
  • Measuring tape
  • Yardstick or long straight edge
  • Square
  • Tailors chalk
  • Dumbell weights to hold materials down
Connection Options
Many quilts including those from Enlightened Equipment and Thermarest have systems to connect the quilt to the sleeping pad. This keeps the quilt from moving around when you toss and turn. 
The Enlightened Equipment
quilt strap system

The Enlightened Equipment system uses small clips along the sides of the quilt that correspond with clips on pieces of elastic that fit around the sleeping pad. This enables the user to snug the quilt up tightly around the body in cold weather. This system would be easy to integrate into a DIY quilt. Here is a link to a detailed description of how that system works.

Thermarest Loops and Snaps
Thermarest uses a system for their quilts which is much simpler than Enlightened Equipment but it doesn't give the user the ability to snug the quilt up around the body. This system uses small loops on the sleeping pad or sheet and little straps with snaps on the quilt itself. This system would be easier to incorporate into a DIY quilt and easily fixed if a snap broke.  


Someone on the Hammock Forums mentioned adding 'draft stoppers' to the edges of
Ray Way finished quilt
The darker blue fabric on the edges
 is the draft stopper 
the quilt. These draft stoppers are just single layers of 6" wide shell fabric sewn to the edges of the quilt. They eliminate any drafts that might occur from a gap between the quilt and the sleeping pad / ground. I did a bit of research and found that the 
Ray Way Quilt Kit uses this design. The image to the right shows a Ray Way quilt turned upside-down so you can see the draft stopper edges. 


Did you find this post helpful? Do you enjoy reading this blog? Help me keep it going by buying me a 'coffee'


Ready to get started? Click HERE for Part Two


Traveling Safe: Help Rescuers Help You and Get Your Phone Back


Make it easy for someone to return your lost phone or contact your family in an emergency by putting your emergency contacts' information on the lock screen of your phone. I believe that 95% of people are good, honest people and will return your phone if they can. You can also add pertinent medical information like any allergies you have or medications you are taking. There are several ways to do this, and I'll walk you through them.

This post is written for iPhones but I assume there are similar apps and options on Android devices.


The easiest, fastest method: Using the Notes App

  1. Open the 'Notes' app on your phone. 
  2. Hit the return key until you are almost halfway down the page
  3. Type in your information, making sure to bold the most important items and using the space bar to center your text
  4. Take a screen shot by pushing the round home button on the bottom of your phone at the same time you push the lock.on/off button on the top of your phone
  5. Exit the 'Notes' app and open the Settings app.
  6. Scroll down to 'wallpaper' and click 'choose new wallpaper'
  7. Find the screenshot of your notes page, turn perspective zoom off and move the image until the lettering is just below the middle of the screen and hit save. 


The prettiest method: Using the 'Word Swag' app
  1. Go to the App Store and download the 'Word Swag' app ($3.99)
  2. Pick a pretty photo from your camera roll that was taken vertically and select 'don't crop' or go online and google pretty photos like clouds or stars and save the image to your photos by holding down on the image until 'save image' appears. 
  3. Type your text into the custom text area, making sure that the 'auto line breaks on' button is slid to the left to turn it off
  4. Use the return key to separate the lines of text
  5. Once you have your text typed in, click 'save & close'
  6. Now you can play with the style, color and size of the text. Remember your phone will zoom in so you want some room on either side of your text and your text to begin just below center of the screen. 
  7. Click 'Done' 
  8. Go to your 'Settings' app and scroll down to 'wallpaper'
  9. Select the photo you made in word swag, turn perspective zoom off and move the image until the lettering is just below center of the screen and you can read all the wording. If your wording was too big, you will have to go back and start over. Unfortunately Word Swag does not allow you to edit previously saved photos. 

Traveling Internationally 

If you're headed abroad, download the local language to the keyboard of your phone while you have internet. You are downloading just the keyboard for that language, not changing your phone to that language. This means your phone will still be in English and your default keyboard will be English. To switch languages while writing or texting, simply click the little gray globe at the bottom left near the spacebar.

When you arrive, enlist a local friend to help you write your information in their language. Make sure that the number listed next to the local language is someone who speaks it fluently and knows how to contact you and any other important information about you.

On the screen to the left, the number next to 'English' was my local cell phone number- a little brick Nokia.  The number next to the Arabic and French number was my Moroccan country director's number.


Medical ID and Health App

Don't forget to update your Medical ID in your Health app (iPhones) and enable Medical ID to show on the lock screen. This is important if you have 'push notifications' enabled on your phone. If you have recently received a text message or other notification and you have not looked at it, the background you're about to create may not appear. The only way for rescuers to access important information is through the Medical ID


First days in New Zealand


I was so lucky on my journey from Raleigh to New Zealand. A delay in my original itinerary made it necessary to change flights completely. I ended up taking two flights to Hawaii instead of three, and avoided the dreaded LAX airport.

I had a whole row to myself on the flight to Auckland and slept most of the 9-hour flight.
Those nine hours of sleep were crucial to prepare me for the jam-packed day that awaited me after my 7am arrival. Because I stayed awake until that leg of the journey and got such good sleep on that flight, I didn't experience much jet lag at all. We had a long scenic drive along the Northern Coast, a short hike to see Cathedral Cove, and then more driving through mountains to our ending point in Raglan. 

American citizens are very lucky travelers,  especially in New Zealand. There is an expedited customs lane for US, Canadian, Aussie and UK citizens. Americans get a free 3-month tourist visa on arrival. 

Tony picked me up in our bright blue Subie hatchback rental and we hit the road. I've always wanted a bright blue Subaru hatchback, and at last, I have one, even if it's just for a little while. 

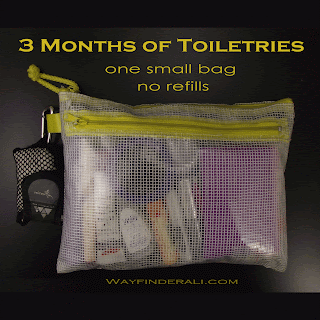
3 months of Toiletries in One Small Bag, No Refills

travel toiletries in bag

The photo above is every toiletry item I need for 6 months. Seriously, without refilling anything.
That includes menstrual products.  
Keep reading to see what and how I pack....