Pages

Drop Down MenusCSS Drop Down MenuPure CSS Dropdown Menu

DIY Outdoor Gear Resources to MYOG


MYOG DIY outdoor gear making resources

I love making things myself. I've always dreamed of having my own outdoor brand- not a very feasible business idea that I would probably end up hating in the long run. With all the technical fabrics available online, we are no longer bound to the products made by big outdoor brands. You'll find fabric, patterns and tutorials online for everything from backpacks to tents to sleeping bags and rain jackets. I've put together the resources I go to when I have a project. If you know of any that I haven't listed, please mention them in the comments.


Forums
HammockForums.net This forum is the go-to spot for hammock camping tricks. There is a forum for all things DIY, just don't post with tent making questions as it is a hammock camping only forum.

WhiteBlaze.net This is a community of Appalachian Trail enthusiasts with TONS of info on the AT- you can get answers to all your AT questions. There is also a forum on here for DIY gear.

BackpackingLight has forums dedicated to a variety of topics including a MYOG Forum (make your own gear) To post to the forum you must have a basic membership to the site which costs $5 a year

Backpacking.net has a little corner of their website dedicated to a MYOG forum. 

MYOG on Reddit - A fantastic forum full of resources, projects and advice

DIY 20°F Ultralight Backpacking Quilt Part 4-
Final Touches and Thoughts

Final Touches

Installing the Cord / Bungee

  • Cut your cord or bungee at least 6 inches longer than the length of your casing. This will make it easier to tie knots in once it is in place. 
  • Use some wire (I used a paper clip) to create a hook that will enable you to feed your cord through the casing
  • I used glow in the dark paracord because I had a bunch laying around. To reduce bulk and weight, I removed the core strands. 

My hook made from a paperclip
Drawcord with mini-cord locks installed


DIY 20°F Ultralight Backpacking Quilt Part 3 - Pinning and Sewing


Stacking and Pinning

If you are using thick insulation like I am, you will definitely need 'quilting' length straight pins. Using regular length pins will not work. I bought 1 3/4" pins for 7.5oz Climashield and it worked. If I had 10oz I would need longer pins. 
  • Pin your Shell and Liner fabric with right sides together. If your fabric has a side that is more shiny, that is the 'wrong' side
  • Sandwich the straps or draft flaps between the shell and liner, with the end of the strap/flap you want to be on the outside edge of your quilt pointing toward the center line of the quilt
  • After you've pinned the shell and liner to each other, pin the insulation on the bottom to them. The insulation will run against the feed dogs of your sewing machine


DIY 20°F Backpacking Quilt Part 2- Marking and Cutting

What you need to mark and cut

  • Weller Woodburner or a hot knife. Any nylon fabric needs to be cut with heat so that the edges are sealed and will not unravel. Even capturing the edge with a french seam only delays unraveling. 
  • Some sort of heat-resistant material to put under your shell and liner fabrics- either a piece of wood, metal or glass. A few people online have used scissors to cut the fabric and then sealed the edge with a lighter, but they say it is extremely easy to accidentally melt too much fabric.
  • Good Sharp Fabric Scissors at least 9" long if you are working with thick insulation like I am. If your insulation is thinner, smaller scissors will work. Just make sure they're sharp. 
  • Permanent fine tip marker
  • Tailors chalk

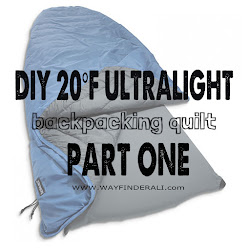
DIY 20°F Ultralight Backpacking Quilt for $100 Part One

Why a Quilt?

This is what I already have-
The fitted sheet and tech blanket by
Thermarest
I chose to use a quilt for my sleep system this summer for several reasons:
  1. The insulation underneath you in a sleeping bag gets so compressed that hardly provides any insulation
  2. Quilts weigh less
  3. I toss and turn at night and sleep on my stomach, back and side. Mummy bags annoy me. 
  4. I already have the Thermarest sleep system which consists of a fitted sheet for my sleeping pad and a very lightweight tech blanket that snaps to it. I plan to use my fitted sheet with my DIY cold weather quilt. 
  5. I couldn't afford a high quality 20°F mummy bag that weighed a reasonable amount. 
Why bother making it myself?
  1. I have read online that people with no sewing experience have been very successful making these. I have a good amount of sewing experience so I hope it will be easier for me.
  2. The wait time to get a quilt from a manufacturer is up to 8 weeks and I didn't have that long to wait. 
  3. I saved $80 by making it myself
  4. I get to make my blanket in the colors I want and with all the details I want

Design and Dimensions

My quilt design is based on the Prodigy Quilt by Enlightened Equipment.
I think the Prodigy is a good product at a reasonable price ($180), but I really needed to save the $80 and make it myself. I also wanted specific colors and a specific kind of liner fabric. 
I picked this design for several reasons:
Prodigy Quilt by
Enlightened Equipment
  1. A casing (sewn channel of fabric) at the shoulders and foot with a bungee cord inside make it easy to create a foot box and cinch the quilt around the shoulders, eliminating heat loss.
  2. The simplicity of the design lends itself to ease of construction- it is a simple polygon without a hood, pockets or sewn channels
  3. The Enlightened Equipment website provides the exact dimensions for quilts to fit different sized people which eliminated the guesswork of figuring out how long and wide my quilt needed to be in order to be comfortable for my size. Here is a link to their Quilt Sizing page which has all the details.
I used the specs for the Short length, Narrow Width quilt which is for little people up to 5'6" who sleep on their backs or toss and turn at night. The finished specs for it are as follows:
Basic Specs:
Total length: 72"
Top half width- 50"
Tapers to 38 " at the foot box.
Insulation- 7.5 ounce Climashield (synthetic insulation)

Weight- 29.65 ounces

I chose to make my quilt go to 20°F because I tend to be a very cold sleeper. Here is a chart to help you choose which weight Climashield you should use:
2.5 oz - 50°F $7.00/yd
3.6 oz - 40°F $9.00/yd
5.0 oz - 30°F $10.95/yd
6.0 oz- 20°F $14.00/yd (only available from DutchWare Gear)
7.5 oz - 10°F $16.95/yd
10 oz - 0°F $23.50/yd
Materials List:
Total Cost: $96 with shipping

Tools and necessities:
  • Sewing Machine with walking foot
  • Quilting Straight pins at least 1 3/4" long
  • Hot knife / Woodburner with blade tip or scissors and lighter for cutting nylon
  • Lighter for sealing cut ends of bungee and elastic
  • Measuring tape
  • Yardstick or long straight edge
  • Square
  • Tailors chalk
  • Dumbell weights to hold materials down
Connection Options
Many quilts including those from Enlightened Equipment and Thermarest have systems to connect the quilt to the sleeping pad. This keeps the quilt from moving around when you toss and turn. 
The Enlightened Equipment
quilt strap system

The Enlightened Equipment system uses small clips along the sides of the quilt that correspond with clips on pieces of elastic that fit around the sleeping pad. This enables the user to snug the quilt up tightly around the body in cold weather. This system would be easy to integrate into a DIY quilt. Here is a link to a detailed description of how that system works.

Thermarest Loops and Snaps
Thermarest uses a system for their quilts which is much simpler than Enlightened Equipment but it doesn't give the user the ability to snug the quilt up around the body. This system uses small loops on the sleeping pad or sheet and little straps with snaps on the quilt itself. This system would be easier to incorporate into a DIY quilt and easily fixed if a snap broke.  


Someone on the Hammock Forums mentioned adding 'draft stoppers' to the edges of
Ray Way finished quilt
The darker blue fabric on the edges
 is the draft stopper 
the quilt. These draft stoppers are just single layers of 6" wide shell fabric sewn to the edges of the quilt. They eliminate any drafts that might occur from a gap between the quilt and the sleeping pad / ground. I did a bit of research and found that the 
Ray Way Quilt Kit uses this design. The image to the right shows a Ray Way quilt turned upside-down so you can see the draft stopper edges. 


Did you find this post helpful? Do you enjoy reading this blog? Help me keep it going by buying me a 'coffee'


Ready to get started? Click HERE for Part Two